How to Build Practice-Based Learning Activities with AI
Four evidence-based methods for designing, building & deploying active learning activities with your favourite LLM

Hey folks 👋
Most L&D teams are using AI to make content faster. The real opportunity is using it as a practice engine.
The Synthesia 2026 AI in L&D Report f2026 AI in L&D Report found that the fastest-growing areas of planned AI adoption aren’t in content creation — they’re in assessments and simulations (36%), adaptive pathways (33%), and AI tutors (29%). In other words: L&D teams are starting to realise that the most powerful use of AI isn’t producing learning materials. It’s creating environments where learners actually practise.
And you can build these right now — no dev team, no custom platform, no code. Each method below includes a prompt you can paste into your preferred AI tool to generate a working interactive prototype: a self-contained practice activity with a briefing screen, a live AI interaction, and a debrief — all running in the browser, ready to share with stakeholders or deploy to learners.
Three platforms can build these interactive prototypes today: Claude (via Artifacts), ChatGPT (via Canvas), and Gemini (via AI Studio Build mode). All prompts below work with Claude Sonnet 4.6, ChatGPT GPT-5.4 Thinking via Canvas, or Gemini 3.1 Pro via AI Studio Build mode. Each renders React or HTML inline and lets you share the result.
If you’re on Copilot, you can still run every method: paste the system prompt (the text in quotes that defines the character, scenario, and rules) directly into a Copilot chat. The AI will play the role, run the scenario, and deliver the debrief within the normal chat window.
The learner experience is a conversation rather than a standalone app, but the practice itself — the questions, the character behaviour, the feedback — is identical. If you’re in a locked-down Microsoft environment, Copilot chat is enough to do all four methods — you just don’t get the interactive wrappers.
A quick note on language: I use “practice activity” as the umbrella term throughout this post. The prompts themselves say “simulation” because AI tools respond better to that instruction — but the design intent is always hands-on practice, not software simulation.
Here are four methods I’ve been testing, grounded in what the research tells us about how practice actually works:
Method 1: Structured Roleplay — practise difficult conversations in real time
Method 2: Decision Simulator — navigate complex trade-offs with compounding consequences
Method 3: Feedback Simulator — get perspective-specific critique on work products
Method 4: Adaptive Case Study — interview a character to diagnose the real problem
Let’s go! 🚀
Method 1: The Structured Roleplay
What it is: You prompt your AI tool to play a specific character — a difficult stakeholder, an anxious patient, a resistant team member — and your learner has to navigate the conversation in real time.
Why it works: The design logic of deliberate practice (Ericsson, 1993) tells us that performance improves most when learners practise in conditions that approximate the real task, with structured feedback and tasks pitched at the edge of their competence — though later research has shown that how practice is designed matters as much as volume alone. Reading a case study about a difficult conversation is not the same as having one.
When to use it: Use when the learning objective is interpersonal performance in the moment — not just knowing what “good” looks like on paper (Bearman et al., 2015). Best suited for difficult conversations, stakeholder management, negotiation, coaching, de-escalation, and any situation where context, emotion, and timing matter (Bele et al., 2023).
Learners should already have baseline conceptual knowledge — this is practice at the edge of competence, not initial instruction (McGaghie et al., 2010). For novices who lack basic schemas for what “good” communication looks like, pair with worked examples or modelling first (Kalyuga et al., 2003).
How to build it: Paste this prompt into your preferred AI tool, then fill in the parts in square brackets. It will generate a working interactive prototype you can click through and share for testing immediately.
Build me an interactive roleplay simulation as a React component. It should have two screens:
Screen 1 — Briefing: A clean, professional briefing screen that explains the scenario, the learner’s role, and their objectives. Include a checkbox (”I’ve read the briefing”) and a “Begin” button.
Screen 2 — Chat: A realistic chat interface where the learner types responses and an AI character replies in real time. Show the character’s name and role in a header. Include an exchange counter. After 10–12 exchanges, the character should end the conversation naturally.
The AI character should be powered by a live API call with this system prompt baked in:
“You are playing the role of [character name], [role] at [organisation]. You are [emotional state] because [situation]. Your goal in this conversation is [character’s objective]. You believe [character’s assumptions — list 3–4]. You have hidden complexity you’ll only reveal if asked the right questions: [list 2–3 hidden layers]. Your personality: [2–3 traits]. Rules: Stay in character throughout. Never break character. Do not coach the learner. Respond in 2–4 sentences — you’re busy and direct. If the learner asks good diagnostic questions, gradually reveal complexity. If the learner just agrees with you, accept enthusiastically and don’t correct them.”
The character’s opening message should be: “[opening line]”
The key design moves:
Give the AI a motivation, not just a personality. “You’re an angry customer” produces flat interactions. “You’re a customer who was promised a refund three weeks ago and is now being told company policy has changed — you feel lied to” produces realistic friction.
Constrain the AI from helping. By default, most AI tools want to be useful. You need to explicitly instruct them to stay in character and not coach the learner. Otherwise, the “difficult stakeholder” will politely explain the correct answer after two exchanges.
Set a clear exit condition. Define when the conversation should end: after a resolution is reached, after five exchanges, or when a specific outcome is achieved. Open-ended roleplays tend to drift.
Increase difficulty progressively. Instruct the AI to start moderately cooperative and become more challenging if the learner handles early exchanges well — or add complicating information mid-conversation. Working at the edge of competence, not comfortably below it, is where growth happens.
🔥 Example - try it for yourself here: The Stakeholder Pushback.
Method 2: The Decision Simulator
What it is: Instead of a conversation, you present the learner with a scenario and force a series of branching decisions. The AI tracks choices and delivers consequences.
Why it works: Scenario-based learning activates what van Merriënboer & Kirschner (2017) call “whole-task practice” — learners deal with the full complexity of a situation rather than isolated sub-skills. The AI adds something static branching scenarios can’t: it adapts consequences to how the learner makes the decision, not just what they choose.
When to use it: Use when the learning objective is complex judgment and whole-task decision-making under realistic constraints (McGaghie et al., 2010). Best suited for objectives like “prioritises trade-offs under uncertainty” or “chooses an appropriate intervention given incomplete, evolving information” — project triage, risk assessments, incident response, client account strategy (Issenberg et al., 2005).
Works best with mid- to advanced-level learners who already know the component parts (policies, frameworks) and need to practise coordination and transfer. Less suited for simple procedural tasks with one correct sequence — in those cases, standard worked examples are more efficient (Atkinson et al., 2000).
How to build it: Paste this prompt into your preferred AI tool, then fill in the parts in square brackets. It will generate a working interactive prototype you can click through and share for testing immediately.
Build me an interactive decision simulator as a React component. It should have three screens:
Screen 1 — Briefing: A professional briefing screen explaining the scenario, the learner’s role, the constraints, and what they need to achieve. Include a “Begin Scenario” button.
Screen 2 — Simulation: A scenario interface (not a chat bubble format — this should feel more like a narrative). Show a scenario description panel at the top, a “Decision log” sidebar tracking all previous decisions and consequences, and a text input where the learner types what they decide to do. After each decision, show the consequence as a new narrative section, then present the next decision point. After 5–6 decisions, move to the debrief screen.
Screen 3 — Debrief: First ask the learner to explain the reasoning behind their 2 most consequential decisions (via text input). Then display the AI’s analysis: their decision pattern, what they missed, key turning points, and two closing reflection questions.
The AI responses should be powered by a live API call with this system prompt:
“You are a simulation engine running a scenario. The learner is [role] facing [situation]. The complicating factors are: [list 4–6 constraints that create realistic tension]. Present one decision point at a time. After each decision, describe the realistic consequence — make consequences cumulative and compounding so early decisions constrain later options. Do not reveal the right answer. Do not offer multiple choice — let the learner decide freely. Respond with: a 2–3 sentence consequence narrative, then a 1–2 sentence new situation requiring a decision. After 5–6 decision points, say DEBRIEF_READY.”
The key design moves:
Front-load the scenario brief. The more context you give the AI about the scenario — the characters, the constraints, the stakes, the realistic complications — the more nuanced the practice activity will be. A paragraph won’t do it. Give it a page.
Make consequences feel real. Instruct the AI to make consequences cumulative and compounding. Early decisions should constrain later options, just like in real life. “You chose to escalate to the client’s manager. The client is now defensive and less willing to share information openly” is far more powerful than “Good choice! Let’s move on.”
Build self-explanation into the debrief. This is where the learning actually happens. Having learners articulate their reasoning before seeing the AI’s analysis forces them to confront their own thinking — not just passively receive feedback. Research on self-explanation consistently shows it deepens understanding and supports transfer.
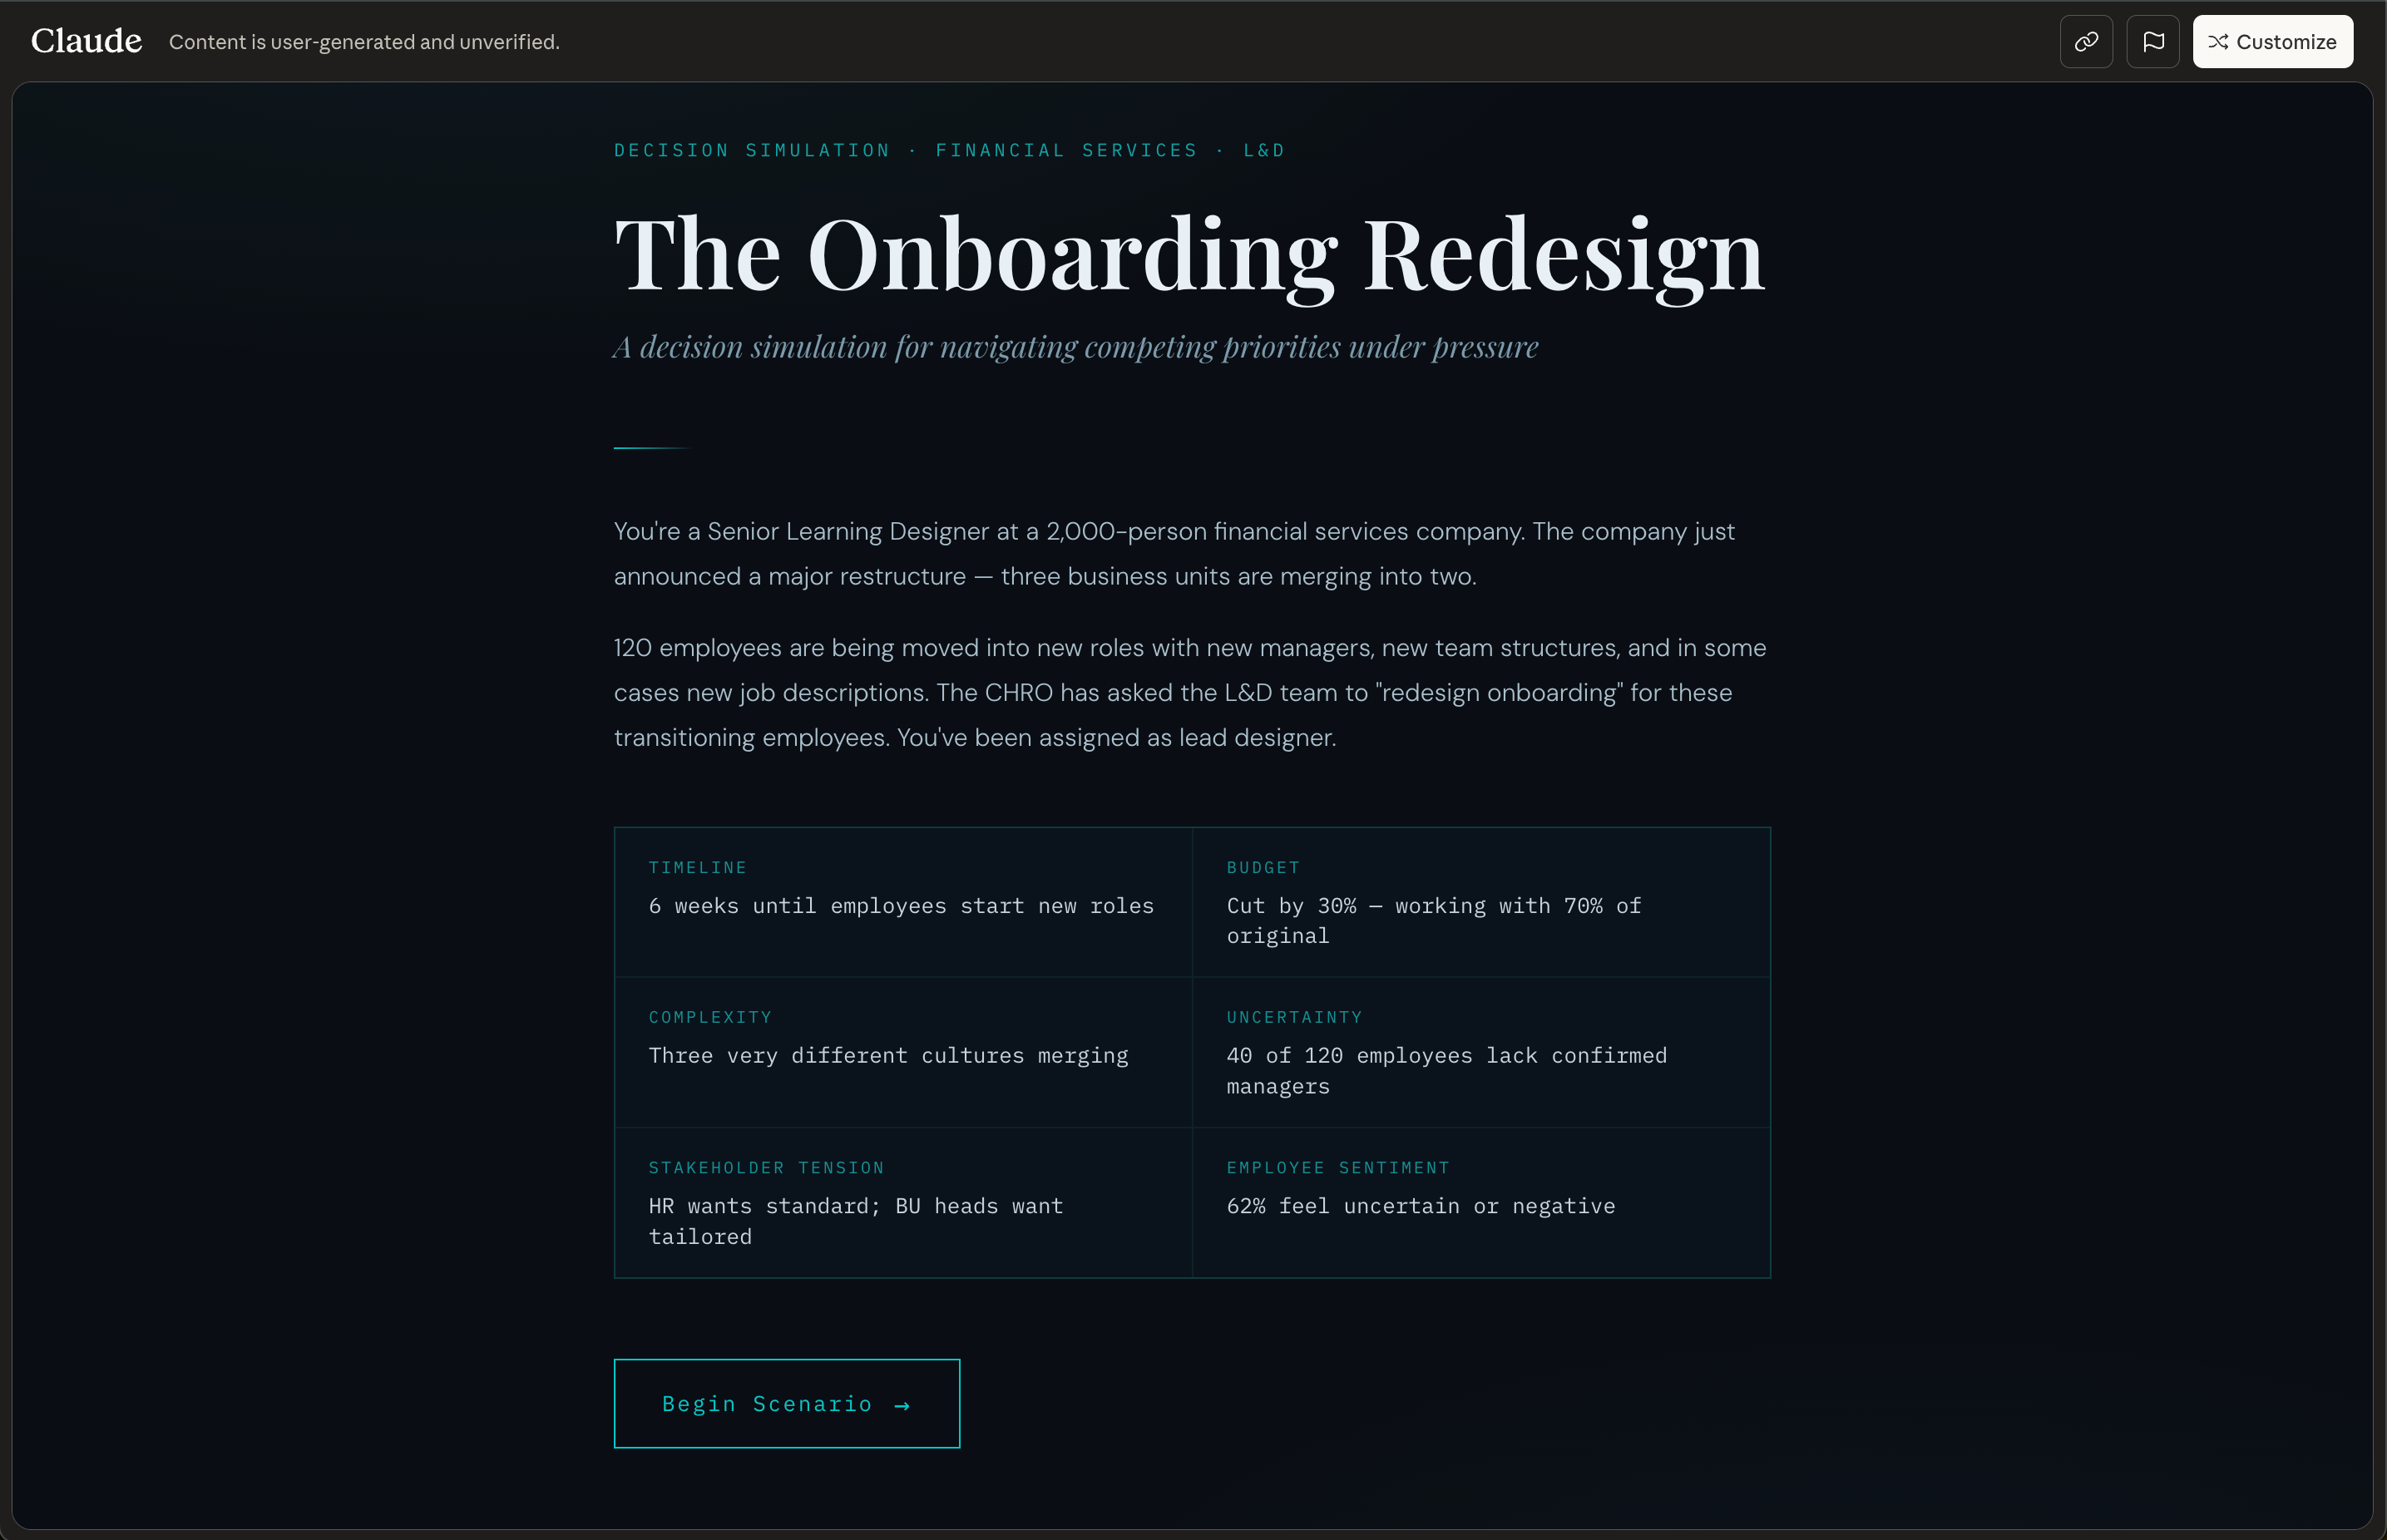
🔥 Example - try it for yourself here: The Onboarding Redesign: A decision simulation for navigating competing priorities under pressure
Method 3: The Feedback Simulator
What it is: The learner submits a work product — a draft email, a project plan, a slide deck summary, a coaching conversation transcript — and the AI evaluates it in role as a specific audience or assessor.
Why it works: My earlier research on AI-generated feedback showed the risks of generic, disembodied AI feedback. But when AI feedback is framed as coming from a specific perspective — a particular type of client, a senior leader with known priorities, a patient with defined needs — it becomes situated feedback, which the evidence shows is far more effective for learning transfer (Nicol & Macfarlane-Dick, 2006).
When to use it: Use when the learning objective is improving the quality of artefacts or written outputs through targeted, formative feedback (Atkinson et al., 2000). Best suited for performance objectives expressed as a product — emails, proposals, slide decks, reports, documentation, consultation notes (McGaghie et al., 2010) — and for developing evaluative judgment: helping learners internalise what different stakeholders value and align their work accordingly (Tai et al., 2018).
Especially valuable in contexts where high-quality feedback is resource-intensive and infrequent, and where iterative draft–feedback–revise cycles are key to skill growth. Works best once learners have at least a basic template or rubric — this is not a method for initial concept acquisition (Kalyuga et al., 2003).
How to build it: Paste this prompt into your preferred AI tool, then fill in the parts in square brackets. It will generate a working interactive prototype you can click through and share for testing immediately.
Build me an interactive feedback simulator as a React component. It should have three screens:
Screen 1 — Briefing: Explain who the AI reviewer is (their name, role, and what they value), what type of work product the learner should submit, and what they’ll get back. Include a “Start” button.
Screen 2 — Submission & Feedback: A clean text area where the learner pastes or types their work product (e.g., a draft email, a project summary, a stakeholder update), with a “Submit for Review” button. After submission, display the AI reviewer’s feedback — formatted clearly with specific references to what works, what doesn’t, and why, based on the reviewer’s stated priorities. End with 1–2 concrete improvement suggestions and a “Revise & Resubmit” button that lets the learner try again.
Screen 3 — Comparison (shown after 2nd submission): Display the reviewer’s new feedback alongside a summary of what improved and what still needs work.
The AI reviewer should be powered by a live API call with this system prompt:
“You are [name], [role]. You value [2–3 specific priorities — e.g., ‘data-driven arguments over anecdotal evidence’, ‘clarity over comprehensiveness’, ‘direct language with no jargon’]. The learner will submit [type of work product]. Evaluate it from your perspective. Be specific: reference exact phrases or sections. Identify what works and what doesn’t, based on your stated priorities. Do not be generically encouraging. End with 1–2 concrete suggestions. Keep feedback under 200 words — you’re busy and direct.”
The key design moves:
Make the assessor’s values explicit. “You value data-driven arguments over anecdotal evidence” gives the AI a consistent lens. Generic feedback (”This is well-structured!”) adds nothing. Perspective-specific feedback (”Your opening paragraph makes a claim without supporting data — I’d stop reading here”) teaches.
Build in the revision loop. The real learning happens when the learner revises and resubmits based on the feedback. One-shot feedback is assessment. Iterative feedback is practice.
Use multiple perspectives. Have the learner submit the same work product to two or three different AI “reviewers” with different priorities. A finance director and a creative director will critique the same presentation very differently. That contrast is where critical thinking develops.
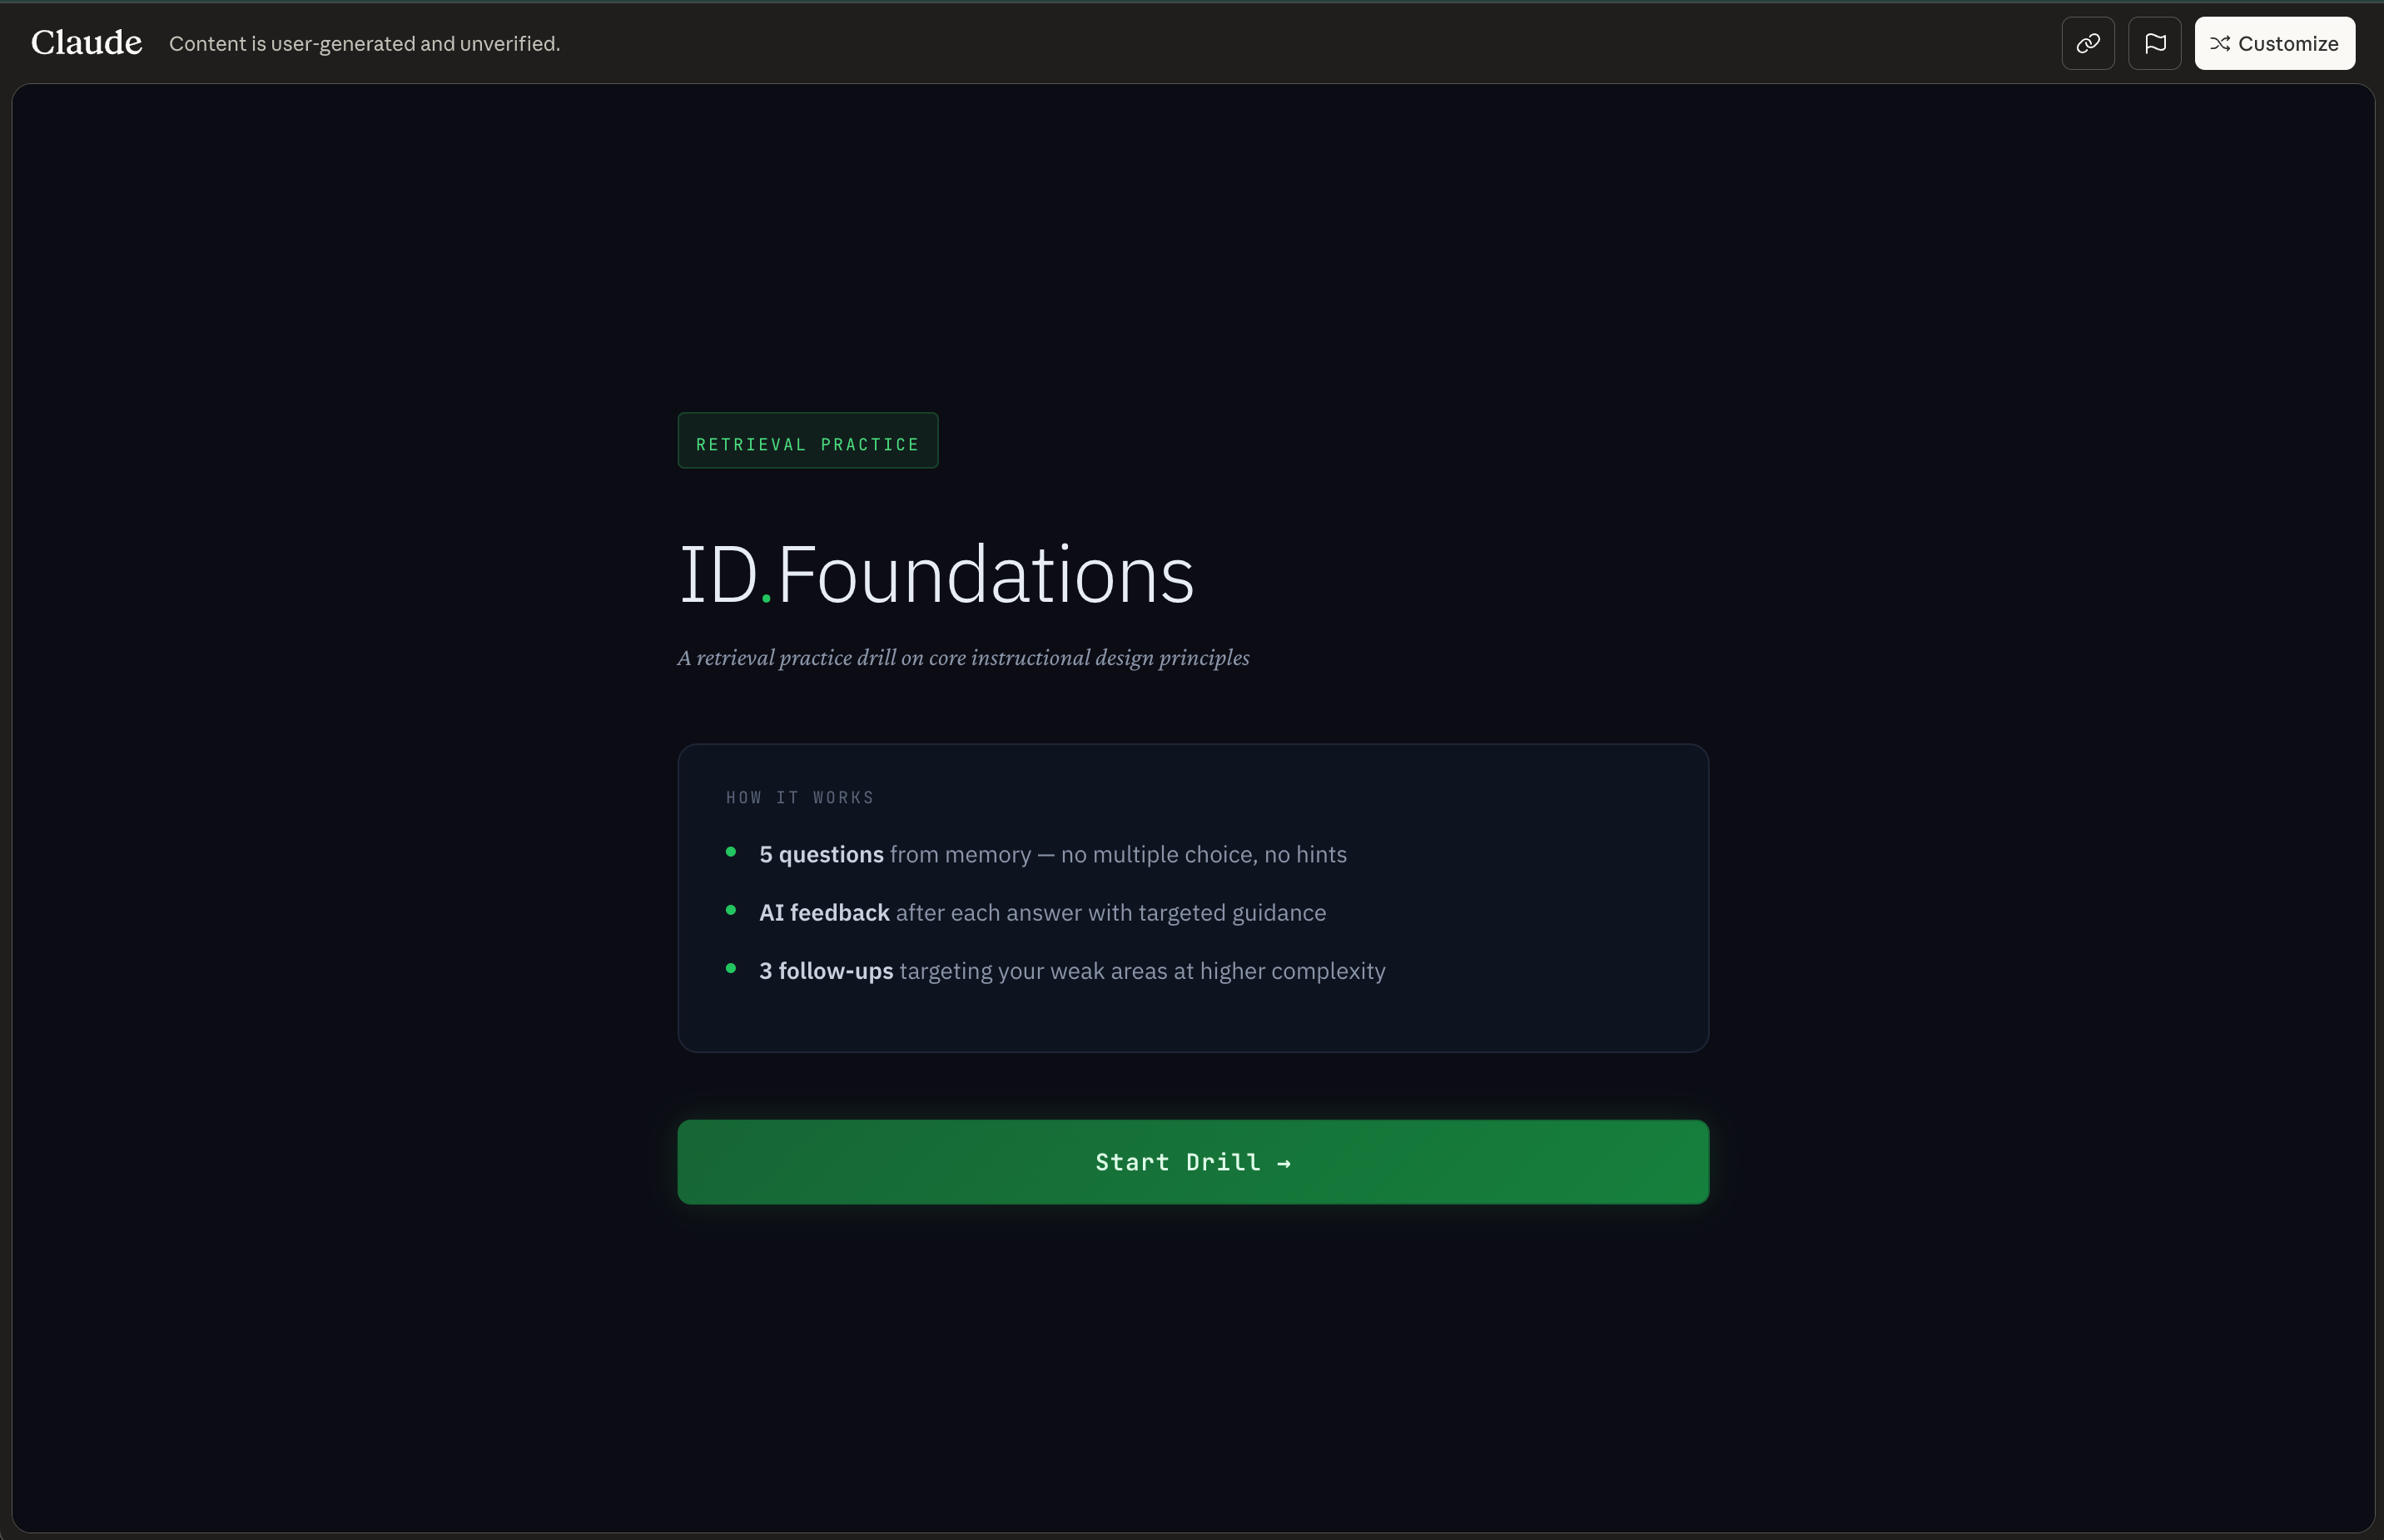
🔥 Example - try it for yourself here: ID.Foundations - A retrieval practice drill on core instructional design principles
Method 4: The Adaptive Case Study
What it is: A traditional case study — but the AI plays the role of a character within the case who the learner can interview to gather information before making their recommendation.
Why it works: Static case studies hand learners all the information on a plate. Real problems require you to figure out what questions to ask and who to ask them to. This method practises what Jonassen (2000) calls “problem finding” — arguably the most under-developed skill in most L&D programmes.
When to use it: Use when the learning objective is problem finding, information-seeking, and diagnostic reasoning in ill-structured domains (Bele et al., 2023). Best suited for situations with no single correct answer and incomplete or conflicting information — organisational change, strategy, complex patients, policy design (McGaghie et al., 2010). The core skill being trained is inquiry: deciding what to ask, whom to ask, and what to trust (Jonassen, 2000). Less appropriate where tasks are well-structured with clear problem statements and known solution paths — there, direct worked examples and guided practice are more efficient (Kalyuga et al., 2003).
How to build it: Paste this prompt into your preferred AI tool, then fill in the parts in square brackets. It will generate a working interactive prototype you can click through and share for testing immediately.
Build me an interactive adaptive case study as a React component. It should have three screens:
Screen 1 — Briefing: Explain the case scenario, the learner’s role (e.g., consultant, new manager), who they’ll be interviewing, and their objective (gather enough information to make a recommendation). Include a “Begin Interview” button.
Screen 2 — Interview: A chat interface where the learner asks questions and the AI character responds. Show the character’s name, role, and a note: “This character only knows what they know — ask carefully.” Include a “Ready to make my recommendation” button that the learner clicks when they feel they have enough information.
Screen 3 — Recommendation & Evaluation: First, prompt the learner with: “Before I respond — what’s the one thing you’re least certain about in your recommendation, and why?” (text input). Then a second text input for their full recommendation. Then display the AI’s evaluation: what they got right, what they missed, which questions they didn’t ask that would have changed their recommendation, and a reflection question.
The AI character should be powered by a live API call with this system prompt:
“You are [character name], [role] at [organisation]. The situation is: [scenario]. Answer the learner’s questions honestly, but only share information they specifically ask about — do not volunteer anything. You have strong opinions on [aspects] — share them when asked. You also have blind spots: [what this character wouldn’t know or would get wrong]. Keep responses concise: 2–4 sentences. You don’t know everything, and some of what you believe is wrong.”
The key design moves:
Give the character incomplete and biased information. Real stakeholders don’t have the full picture. Making the AI character’s knowledge partial and perspective-skewed forces the learner to triangulate, cross-reference, and think critically about what they’re hearing.
Reward better questions. The quality of the learner’s information-gathering directly affects the quality of the AI’s responses. Vague questions get vague answers. Specific, probing questions unlock useful detail. This makes the process of inquiry — not just the final answer — the thing being practised.
Layer multiple characters. For complex case studies, run the same scenario with two or three different characters (in separate chats). The learner interviews each one, notices inconsistencies, and has to reconcile conflicting accounts before making their recommendation.
Prompt reflection before the reveal. Asking learners to name their uncertainty before the AI evaluates their recommendation surfaces metacognitive awareness — the ability to monitor your own thinking — which is one of the strongest predictors of whether learning transfers to new situations.
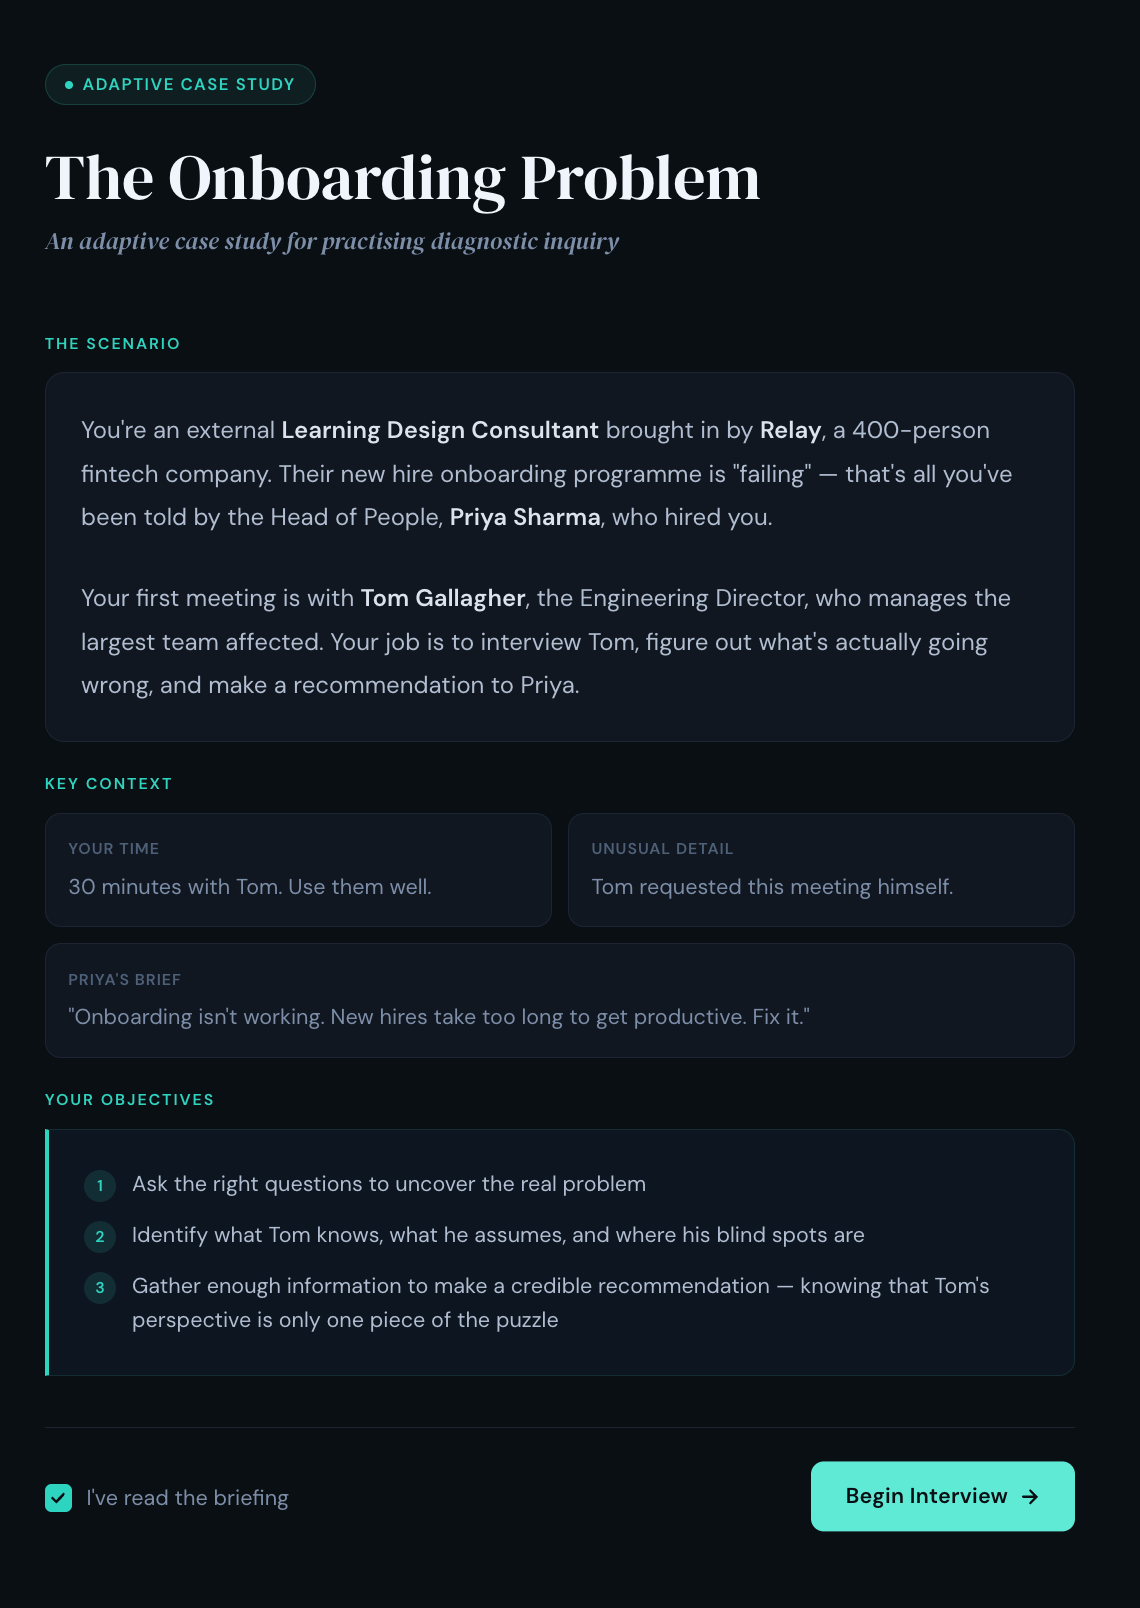
🔥 Example - The Onboarding Problem: An adaptive case study for practising diagnostic inquiry.
From Prototype to Production: How to Integrate AI Activities in Your Workflow
You’ve got a prompt and a prototype. Now what? Here’s the workflow I use to go from idea to deployed practice activity — typically in under a day.
You paste a prompt, get a working prototype in minutes, run through it yourself, share it with a stakeholder for feedback, iterate on the prompt until the scenario feels right, then deploy it to learners via a shared link, a Custom GPT, or your LMS. No dev team at any stage. The whole cycle — from “I have an idea for a practice activity” to “learners are using it” — can happen in a single day if the scenario is straightforward, or across a week if you need stakeholder sign-off and iteration.
Here’s what each stage looks like:
Step 1: Prototype to Get Sign-off
Paste any of the prompts above into Claude, ChatGPT Canvas, or Gemini AI Studio Build mode. You’ll get back a working interactive practice activity you can click through immediately. Run through it yourself. Screen-record the interaction. Then share the recording and the prototype link with your SME or stakeholder for feedback.
This is the fastest way to get sign-off on a practice activity concept without building a thing. Instead of writing a 12-page design document describing how a branching scenario might feel, you share a working prototype. Stakeholders click the link, try the activity themselves, and give you feedback on the actual experience — not an abstraction of it. This gets you better feedback in one meeting than three rounds of storyboard review.
Step 2: Test the Learning, Not Just the Tech
Once you have a working prototype, resist the urge to ship it straight away. A prototype that runs smoothly isn’t the same as a practice activity that teaches effectively. Before you deploy, run two quick checks:
Expert plausibility check (10–15 minutes). Ask a SME or trusted high-performer to run the activity once. Have them answer three questions: How realistic is the scenario and character? Where did the AI say or allow something we’d never accept in practice? Does the debrief evaluate against the right standard? Use their comments to tighten the system prompt — this is where you catch the AI giving advice that contradicts your organisation’s policies, or a character that breaks too easily under questioning.
🔥 Tip: You can use AI to generate your test cases. Paste your system prompt into a fresh chat and say: “I want to run a product test on this practice activity before I deploy it. Based on this prompt, give me 2–3 typical learner interactions I should test and 2–3 edge cases that might break the experience — e.g., a learner who goes off-topic, gives one-word answers, or tries to get the AI to break character.” Run each case yourself. If the AI breaks, tighten the rules in the system prompt and test again.
Learner usability check (20–30 minutes). Put 3–5 target learners in front of the prototype. Watch or screen-record as they use it. You’re looking for: Where do they hesitate or get confused about what to do? Does the difficulty hit the right level — stretched but safe, not lost or bored? Do the debrief questions prompt genuine reflection, or do learners skim past them? Make small changes to the prompt based on what you observe — tighten the character’s rules if it’s breaking, add complicating factors if it’s too easy, make debrief questions more specific if learners are rushing through them.
🔥Tip: Use AI to build your feedback form too. Paste your system prompt into a fresh chat and say: “I’m about to test this practice activity with 5 learners. Create a short feedback checklist they can fill in immediately after — no more than 6 questions. Cover: clarity of instructions, realism of the scenario, difficulty level, quality of the debrief, and one open question about what they’d change.” Print it or share it as a form. This takes two minutes and gives you structured data instead of vague “yeah, it was good” responses.
The fix for almost everything you find at this stage is the same: edit the prompt. A 10-minute tweak saves you from deploying something that looks polished but doesn’t actually teach. Two rounds — one to find the problems, one to confirm your fixes worked — is usually enough. This isn’t a six-month validation study; it’s a lightweight formative evaluation loop to confirm that the AI behaves acceptably and the activity targets the skill and difficulty level you intended.
Step 3: Add Tracking When You Need It
Once the activity is signed off, you may need to get it into your LMS. The code your AI tool generated is a self-contained web application — which means it can be hosted as a webpage and linked or embedded from anywhere.
The simplest route: Take the code, drop it into a free hosting service (Netlify and Vercel both have one-click deploy from a file), and you’ll get a permanent URL in about five minutes. Paste that URL into your LMS as an external link or embed it via iframe on a course page. Learners click it, the activity runs in their browser, done. This works with virtually any LMS. The trade-off: your LMS won’t track completion automatically, so you’ll need learners to self-report or use a workaround like a follow-up quiz that confirms they’ve done it.
If you need completion tracking: Tools like Parrotbox (by Sonata Learning) wrap AI-powered activities in a SCORM package — the standard format every LMS already understands. You upload a .zip file to your LMS the same way you’d upload any e-learning module. Learners launch it from the course catalogue, and the LMS records completion, scores, and time spent, just like it would for an Articulate or Captivate module. If your organisation uses a Learning Record Store with xAPI, you can capture richer data — which questions learners asked, which decisions they made, where they struggled — but most teams should start with the hosted URL or SCORM route and only add xAPI when they need cohort-level analytics.
Conclusion
These methods are not a replacement for a well-designed learning experience — they’re components within one.
A practice activity without clear learning objectives, without alignment to real performance needs, and without a pathway that connects practice to application is just a chatbot wearing a costume.
Three things worth keeping front of mind as you design:
Anchor debriefs in your standards, not the AI’s. When the AI delivers “best practice” feedback in a debrief, it’s drawing on its training data — not your organisation’s policies, frameworks, or values. Always specify the standard the AI should evaluate against, and make that standard explicit in the prompt. If you don’t, you’re outsourcing your learning outcomes to a language model.
Structure beats openness. Research on conversational agents in educational settings consistently finds that bounded, topic-structured interactions produce better learning outcomes than fully open-ended ones. Your prompt scaffolding isn’t a constraint on the experience — it is the experience. The more carefully you define the character, the scenario, the exit condition, and the debrief criteria, the better the practice activity performs.
These are supplements, not replacements. AI-powered practice is exceptionally good at giving learners repeatable, low-stakes reps they couldn’t otherwise get at scale. It is not a substitute for facilitated practice, peer learning, or expert coaching. Position it as the place learners build confidence and fluency before they practise with real humans — not instead of it.
The tools are already on your learners’ desktops. The design challenge — as always — is yours.
If you’re a practitioner: pick one method and ship a prototype this week. If you’re a leader: pick one critical skill gap and ask your team to show you a working practice activity — not a storyboard.
Happy innovating!
Phil 👋
PS: Want to master AI‑augmented instructional design? Apply for a place on my AI & Learning Design Bootcamp where we get hands on try and test methods just like this.